Hey there! If you’re anything like me, you probably love the feeling of a clean and fast computer. Over time, our machines can get bogged down with junk files, temporary data, and other unnecessary clutter. But don’t worry – I’ve got you covered! Here’s a friendly, easy-to-follow guide to help you clean your Windows 11 computer and keep it running smoothly.
Why Clean Your Computer?
First things first, why should you even bother cleaning your computer? Over time, our PCs collect a bunch of unnecessary files and data that can slow them down. These include temporary files, system cache, and old downloads. By removing these, you can free up space, enhance performance, and extend the lifespan of your computer.
1. Empty the Recycle Bin
The first stop on our cleaning journey is the Recycle Bin. When you delete files, they aren’t actually gone until you empty the Recycle Bin. Here’s how:
- Open the Recycle Bin: Double-click the Recycle Bin icon on your desktop.
- Empty the Recycle Bin: Right-click inside the Recycle Bin window and select “Empty Recycle Bin.”
- Confirm Deletion: Click “Yes” to confirm.
Pro tip: If you want to skip the Recycle Bin altogether when deleting files, hold down the Shift key while you press Delete.
2. Delete Temporary Files
Temporary files can take up a lot of space. Windows 11 makes it easy to get rid of them:
- Open Settings: Press Win + I to open the Settings app.
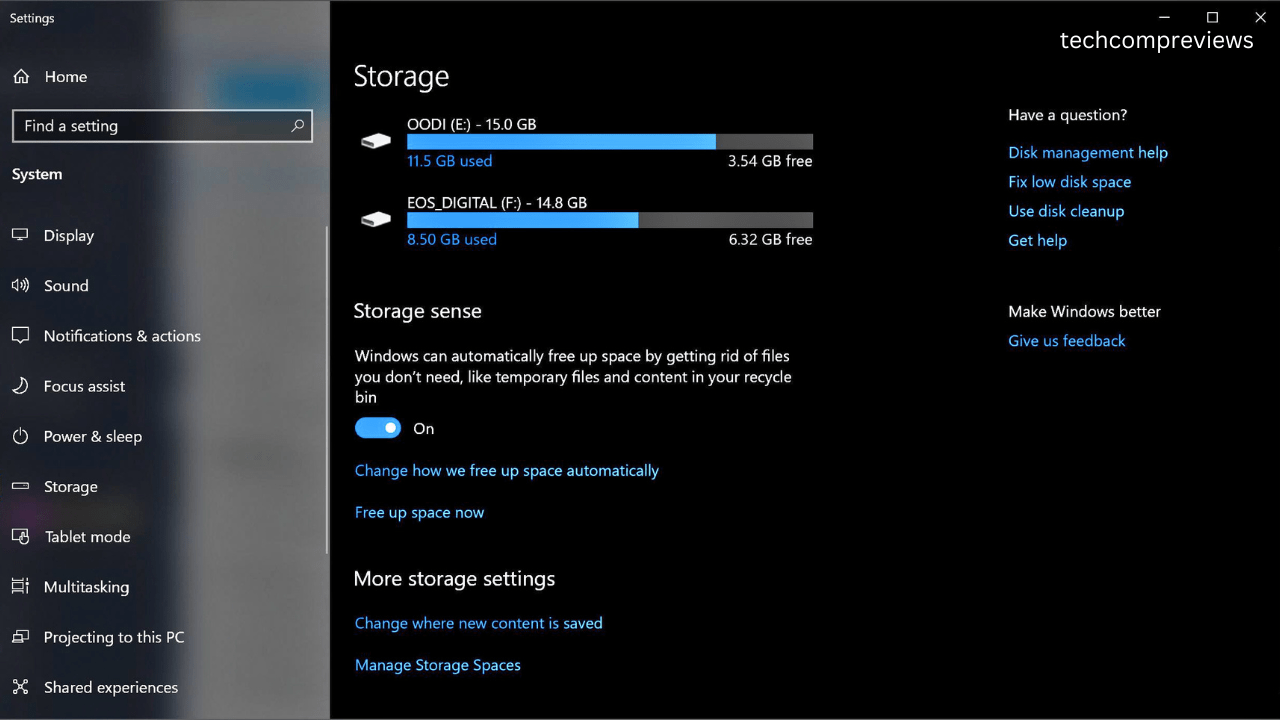
- Navigate to Storage: Go to System > Storage.
- Remove Temporary Files: Click on “Temporary files,” check the boxes for the types of temporary files you want to delete, and then click “Remove files.”
You can also enable Storage Sense to automatically delete temporary files:
- Turn on Storage Sense: In the Storage settings, toggle Storage Sense to “On.”
- Configure Storage Sense: Click on “Storage Sense” to set up automatic cleaning schedules.
3. Use Disk Cleanup
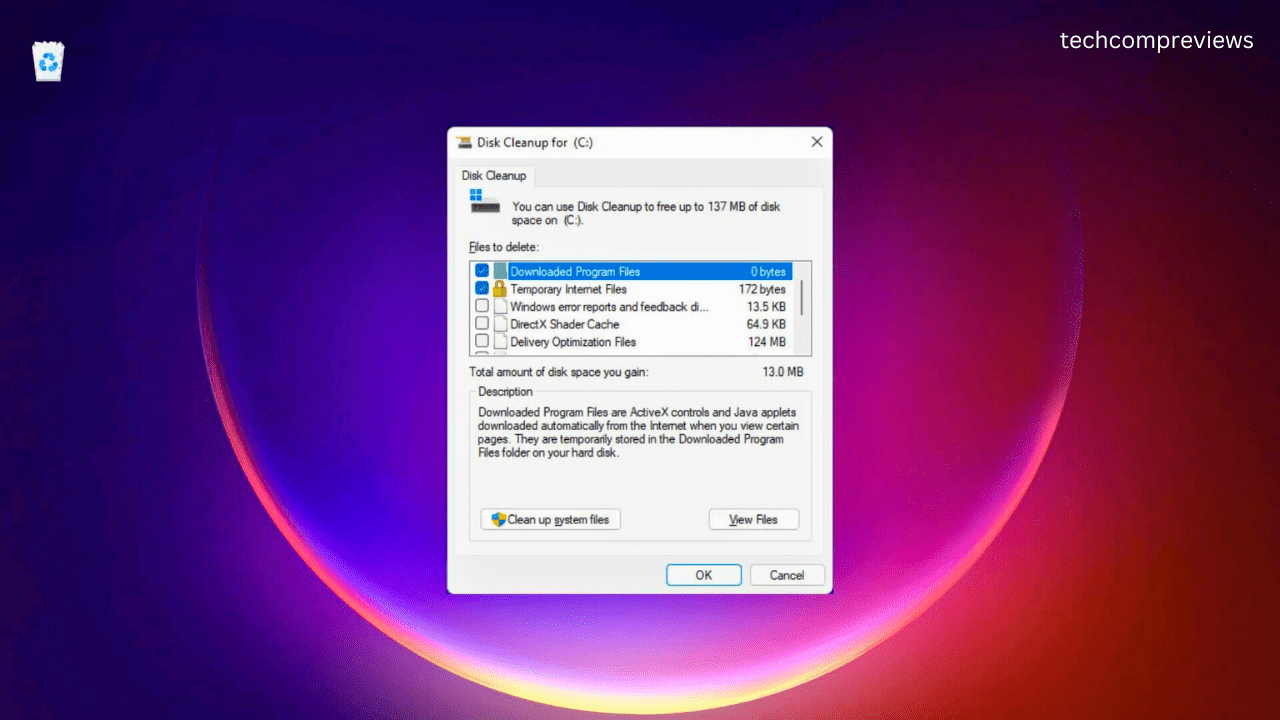
Disk Cleanup is a built-in tool that can help you free up even more space:
- Search for Disk Cleanup: Type “Disk Cleanup” into the Start menu search bar and open the app.
- Select Drive: Choose the drive you want to clean (usually the C: drive) and click “OK.”
- Clean System Files: Click “Clean up system files” and select the drive again.
- Select Files to Delete: Check the boxes next to the types of files you want to delete and click “OK,” then “Delete Files.”
4. Uninstall Unnecessary Programs
Sometimes, we accumulate programs that we no longer need. Uninstalling them can free up space and improve performance:
- Open Settings: Press Win + I to open the Settings app.
- Navigate to Apps: Go to Apps > Apps & features.
- Uninstall Programs: Scroll through the list of installed programs, click on any you no longer need, and select “Uninstall.”
5. Run a Third-Party Cleaning Tool
While Windows has built-in tools, third-party programs like CCleaner can offer more comprehensive cleaning:
- Download and Install CCleaner: Go to the CCleaner website, download the free version, and install it.
- Open CCleaner: Run the program and go to the “Custom Clean” section.
- Analyze Your System: Click “Analyze” to see what can be cleaned.
- Run the Cleaner: Click “Run Cleaner” to delete selected files.
6. Manage Startup Programs
Too many startup programs can slow down your computer. Here’s how to manage them:
- Open Task Manager: Press Ctrl + Shift + Esc to open Task Manager.
- Go to Startup Tab: Click on the “Startup” tab.
- Disable Unnecessary Programs: Right-click on any programs you don’t need to start automatically and select “Disable.”
7. Defragment Your Hard Drive
If you’re using an HDD (not an SSD), defragmenting can help improve performance:
- Search for Defragment: Type “Defragment” into the Start menu search bar and open “Defragment and Optimize Drives.”
- Select Drive: Choose the drive you want to optimize and click “Optimize.”

8. Update Windows and Drivers
Keeping Windows and your drivers updated can prevent issues and improve performance:
- Check for Windows Updates: Go to Settings > Windows Update and click “Check for updates.”
- Update Drivers: You can update drivers through Device Manager or use a third-party tool to ensure all your drivers are current.
9. Use Storage Sense Regularly
Storage Sense can automate the cleaning process:
- Configure Storage Sense: In Settings > System > Storage, toggle Storage Sense on and configure it to run at intervals that suit your needs (e.g., every month).
Conclusion
And there you have it. By following these steps, you can keep your Windows 11 computer running smoothly and efficiently. Regular maintenance not only helps free up space but also ensures your system remains speedy and reliable. Happy cleaning.
Read Also: